
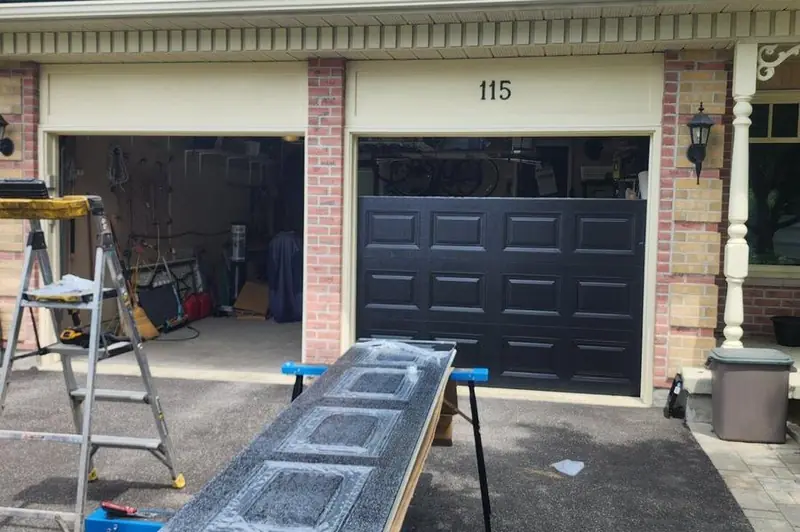
Before the crew arrives
A little prep makes installation day go faster and smoother. Clear the garage floor and walls near the door of vehicles, storage bins, tools, or anything hanging near the track area — installers need clear working space on both sides of the opening and overhead. If you have pets, plan to keep them elsewhere in the house during the job, both for their safety and so the crew can move freely in and out of the garage.
If you're switching door sizes or styles significantly from what's currently installed, we'll have already discussed any structural considerations (header reinforcement, track clearance) during the quote, so there shouldn't be surprises on the day itself.
The typical installation timeline
- Arrival and walkthrough (10-15 minutes). The lead technician confirms the door model, colour, and any accessories match your order, and does a quick check of the opening and existing hardware.
- Old door removal (30-45 minutes). The existing door, track, and related hardware are carefully removed. If you're keeping the same opener, it's typically detached and set aside rather than removed entirely.
- New track and hardware installation (1-2 hours). New tracks, hinges, rollers, and cables are installed and aligned to the opening.
- Panel installation (1-2 hours). Door panels are installed section by section from the bottom up, with careful attention to alignment and level at each stage.
- Spring installation and balancing (30-45 minutes). Springs are sized to the door's actual weight, installed, and the door is balanced so it stays level and stationary when lifted partway.
- Opener installation or reconnection (30-60 minutes) if a new opener is part of the job, including programming remotes and testing the safety sensors.
- Final walkthrough and testing (15-20 minutes). The technician cycles the door multiple times, checks the auto-reverse safety feature, confirms smooth and quiet operation, and walks you through basic care and any warranty paperwork.
Total time for a standard single door with an existing opener reconnected typically runs 3-5 hours; a double door, a new opener installation, or any structural adjustments add time.
What's included that homeowners don't always expect
- Old door and hardware removal and disposal — you don't need to arrange separate haul-away.
- Balancing and safety testing — not just hanging the panels, but confirming the door operates safely and correctly before the crew leaves.
- Basic clean-up of the work area — packaging, old hardware, and debris are cleared before we go.
- A walkthrough of your new door and opener, including how to use manual release, basic troubleshooting, and warranty details.
Ottawa-specific timing considerations
Winter installations are entirely doable and common across the region — we install through the cold season regularly — but very extreme cold snaps (deep into the -25°C to -30°C range with wind chill) can occasionally require rescheduling for crew and material handling safety, particularly with certain sealants and adhesives that need a minimum temperature to cure properly. We'll flag this in advance if weather is a concern for your booked date, rather than surprise you the morning of.
After installation: the first few weeks
A new door and opener may need minor adjustments after the first few weeks of real-world use as everything settles in — this is normal and covered under your installer warranty. Keep an eye (and ear) out for any new noises, and don't hesitate to call if something doesn't feel right; small adjustments are quick to make and prevent bigger issues down the line. See our warranty guide for what's typically covered in this early period.
To prepare for the visit or get a quote first, see our Door Guide for style options and our cost guide for realistic 2026 pricing. If you're also replacing the opener, our cold-weather opener guide can help you choose.
Questions worth asking before installation day arrives
- Will the existing opener be reused, or is a new one part of this installation?
- Is any structural work needed on the header or opening, and if so, has that already been accounted for in the quote?
- What's the realistic time window, and is there flexibility if the job runs longer than expected?
- What's included in the warranty, and when does the coverage period start?
Getting clear answers to these before the crew arrives means no surprises on the day itself, and lets you plan your schedule around the visit with confidence.
What a good installation crew does differently
The visible result — a new door that opens and closes — can look similar whether the underlying installation was done carefully or rushed. The difference shows up later: proper balancing prevents premature spring wear, correct track alignment prevents future noise and derailment issues, and careful sensor placement prevents nuisance reversals. A rushed installation might look fine on day one and start causing problems within months. This is part of why we take the time to balance, align, and test thoroughly rather than treating installation as just "hanging the panels."
Financing and payment on installation day
If you're using financing for your new door, that paperwork is typically finalized before installation day itself, so the visit can focus purely on the physical work. See our financing options if you haven't already arranged payment and want to explore flexible terms.
Living with a new door: the first month
Expect the door to feel slightly different from your old one for the first few weeks — smoother, possibly quieter, and with a opener that may have different force and travel settings than you were used to. This adjustment period is normal. If anything feels genuinely off rather than just different, don't hesitate to call — small tweaks early on are easy and are exactly what your installer warranty is there for.
Coordinating installation with other renovation work
If your garage door replacement is part of a larger renovation — new siding, driveway work, or an exterior repaint — sequencing matters. Generally, garage door installation should happen after major exterior work that could risk damaging a brand-new door (like siding installation involving scaffolding or heavy equipment near the opening) but before final exterior painting if you want trim details to be finished together. Mention any other planned exterior work when booking so we can help sequence appropriately.
What if you're not fully satisfied after installation?
If anything about the finished installation doesn't meet your expectations — a colour that looks different installed than it did on a sample, an adjustment that still feels slightly off — raise it during the final walkthrough or shortly after rather than living with it. Addressing concerns while the crew and paperwork are still fresh is always easier than raising them months later, even though most issues remain covered under warranty regardless of timing.
Setting expectations with household members
If other household members will be home during installation, give them a heads-up about the process — some noise, the garage being inaccessible for vehicle use during the work window, and a crew present on the property for several hours. A little advance notice avoids any confusion or inconvenience on the day itself, especially for a household with pets or young children who benefit from knowing what to expect.
After the crew leaves
Once installation is complete and you've done your walkthrough, run the door through a handful of normal cycles over the following few days as part of everyday use, and don't hesitate to call with any question, however small, during that initial adjustment period.
How weather affects the installation schedule
Extreme cold, heavy snowfall, or an active storm can occasionally require rescheduling an outdoor installation for both crew safety and to ensure hardware and sealant materials perform as intended, since some products have minimum application temperature requirements. If weather looks questionable close to your scheduled date, we'll reach out proactively rather than leaving you uncertain about whether the crew is still coming.
What happens to your old door and hardware
Removed door panels and hardware are typically hauled away and responsibly recycled as part of the installation service — steel doors are highly recyclable, and reputable installers handle this disposal so you don't need to arrange separate removal or worry about scrap metal sitting in your driveway after the crew leaves.
How long before you can fully rely on the new door
While the door is fully functional immediately after installation and final testing, opener force and travel settings sometimes benefit from a small fine-tuning adjustment after the door has operated through a handful of real-world cycles, particularly through a full temperature swing from a warm installation day to a colder night. If you notice anything needing a small tweak in the days following installation, that's a normal part of the settling-in process, and a quick adjustment call resolves it.
Ready to book, or have questions about your specific installation? Call (613) 884-1488 or request a free quote online.